

I've been wanting to make small changes to our kitchen, and shabby ruffled curtains were just the right touch! Kind of happy with how these bad boys came out. I mean, I am no seamstress. Darts are what I throw at a board in the local pub and I still haven't figured out where that third thread comes from, somewhere in the depths of the bobbin. It's such a mystery to me.
But, I've seen the rage of ruffles (yes, it's a thing) and I've been intrigued with using painter's cloth for a project, so I broke down and dug the sewing machine out of the bowels of the basement. And I'm glad I did. :) Although my curtains are quite different than theirs, I have to credit two blogs for giving me the inspiration: The Shabby Creek Cottage and Thistlewood Farm. Check out both links if you can, as they are full of good information.
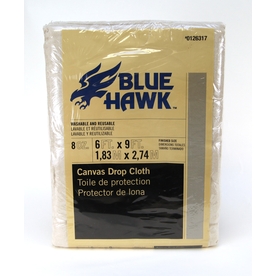
So, the first step was to head to my local handy, dandy Lowes and pick up a package of the thinnest painter's drop cloths they had. I opted for the 6'X9' 8oz. cloth, thinking it might be enough (turns out I needed a little more, so I had to buy another package). I made sure to wash and dry them before using.
Next, I measured the width of my windows and decided on the length I wanted the valances. I also knew that I wanted three ruffles, and knew that each ruffle needed to overlap the other by 2". Also, as you can imagine, your ruffle strips needs to be 4X than the measured width of your window, as you "lose" so much fabric in the ruffling. Since I'm not a girl about exact measurements (ha!), I decided to take the long end of the painter's cloth (9') and cut them into 6" wide strips hoping they would be long enough. Since I am making

Now, I don't have one of those fancy, dancy ruffler feet for my machine, so I just winged it: I folded over the fabric every 1/2" to 1 1/2", varying it so it wouldn't look so uniform. I used a simple long, straight stitch. (The hem you see is the original edge of the painter's cloth.)

When I was finished, this is what it looked like:

Now, after making my three ruffled strips, you need something to stitch them to. So I measured the curtain size I wanted (width and length of the curtain) and cut a piece of painter's cloth that exact size. I pinned my first strip, making sure the bottom of my ruffle matched the bottom of the back fabric, and stitched it on, going across the same stitch I made making the ruffles.

After stitching the first strip on, I then trimmed any excess of the ends (turns out using the 9' width worked out perfectly). I then attached the second strip, overlapping by 2". The final strip was stitched right at the top. I knew I wanted to use black clips on the curtains (due to the black chairs in the kitchen), so I just clipped and hung away!


The kitchen door window was a bit smaller, so I sized down the ruffles.
 |
 |

Overall, I'm very happy with the curtains. My husband does wish I had hemmed the edges, but he is not on the same side of shabby that I am. :)
Have a shabby, ruffled day!
Debbie
Sharing with:
Six Sister's Stuff
To Sew With Love
Lovely Crafty Home
Mad in Crafts
Sugar Bee Crafts
Not Just a Housewife
Reasons To Skip the Housework
The Blackberry Vine
Home Stories A to Z
Coastal Charms
A Bowl Full of Lemons
Or So She Says
Someday Crafts
Fabric Bows and More
Creations By Kara
Gingersnap Crafts
House of Hepworths
At the Picket Fence
Hope Studios
Boogieboard Cottage
Stone Gable
The DIY Dreamer
Cedarhill Ranch
Cute, cute, CUTE!
ReplyDeleteLove these curtains! I am your newest follower...found you on Hometalk.
ReplyDeleteJennifer @ Decorated Chaos
Love it! They turned out so cute!!!! Much cuter than mine! You go girl!
ReplyDeleteblessings,
karianne
Your curtains are adorable!!! You need to keep that sewing machine out & ready to go!
ReplyDeleteThey are fantastic! I'm like you... Sewing is really noot my thing and I hate measuring too!! I've been wanting to make sime go these for my kitchen window and I like that you left the edges unfinished! Now I just have to decide whether to use drop cloth or burlap!!
ReplyDeleteThey look great! I like the unhemmed--they lay better :) Enjoy them :)
ReplyDeleteSo cute! I love the shabby look and those ruffles!
ReplyDeleteYour new curtains are amazing. Love the look. ;o)
ReplyDeleteVery nice. Love them. I am featuring this at somedaycrafts.blogspot.com
ReplyDeleteOh...I so luv these! Think I just might make some for my kitchen sink window:)
ReplyDeleteBlessings,
Linda
they definitely turned out cute! I am pinning this pretty post! thanks for sharing.
ReplyDeleteHugs,
Lelanie
These look really nice!
ReplyDeleteLove them--I am totally inspired!
ReplyDeleteThe diy ruffled curtain is beautiful. Have a look at it
ReplyDeleteCurtain
Informative post to make hand made curtains.For Professional and decorative curtains
ReplyDeleteplease visit
Home theater curtains
Home theatre curtains
I think your ruffled curtains are the best that I have seen in the blog world. They look really cute and I love the one over the door. I have some dropcloth valances in my kitchen also. I love them.
ReplyDeleteThese curtains are so frilly and sassy! They look like you paid big bucks for them!!! What a great tutorial! Thanks for sharing them at TUTORIALS TIPS AND TIDBITS!
ReplyDeleteAll the curtain designs are looks fantastic.And the content is also well informative.
ReplyDeleteThey looks more attractive in frill shaped.
Curtain Rails
Interior Designers
I'm thinking of making something similar to this. I was wondering about the price of the cloth at Lowe's, if it is better than buying it by the yard at the fabric store.
ReplyDeleteI’m flattened for your blogs writings and blogs as well.
ReplyDeletecustom door hardware
I can wear that, you know! :)) You just picked a very fitting color and fabric. Working with ruffles is tricky as it can take you to extreme outcomes. If you choose bright colors, it would be too girly. On the other hand, ruffles hardly create an impact with dark schemes, unless your theme is Gothic. Roxie@www.WindowTreatmentsPhiladelphia.com
ReplyDeleteAH! So excited to have found this! I had bought a bunch of drop clothes for the windows in the family room/kitchen. But wasn't loving the full length look (the room is weird and my couch has to be backed up to on of the windows... ocd) These will be perfect with the current blinds. Thank you!
ReplyDeleteThanks for the blog & instructions! Really cute!
ReplyDeleteAlthough my curtains are quite different than theirs, I have to credit two ... bcurtains.blogspot.com
ReplyDeleteEasy hemming can be done with fabric glue, but yours are perfect as they are! I am not much of a seamstress either (self taught) and I find that when I launder my home made hemmed curtains they end up looking like this!
ReplyDeletewhat size did you use for the window on the door? i have super small windows in my bath (very old house), I want something on them though.
ReplyDeleteGreat curtains. I LOVE the rod set though and was wondering where you got it.
ReplyDeleteIt was gobsmacked blog! my friends must see this. I will tell it when we have time for curtain cleaning.
ReplyDeleteThis is very helpful and explained well thank you about your curtains, however sadly we stopped using imperial in the 60s so all of the measurements in the blog are quite confusing,Sorry. I hope to find a similar one using metric
ReplyDeleteI love this diy rufted curtains.......thank you so much for this informative blog which you do for us, I also sell best designs of curtains with discounts go deal now here.
ReplyDeleteYour curtains are looking amazing! A best curtain" is a piece of cloth intended to block or obscure light.
ReplyDeletecurtains dubai
ReplyDeleteJZ Furniture UK brings you comfort and style. Explore sofas, beds, wardrobes, and more to make your home truly inviting.
ReplyDeleteDiscover premium sliding door wardrobes that combine functionality with sleek design. Perfect for bedrooms and modern living spaces.
ReplyDeleteRedefine your interiors with JZ Furniture UK. High-quality furniture designed for comfort, elegance, and everyday use.
ReplyDeleteThese ruffled curtains turned out so cute! Love how you used painter’s cloth and embraced the shabby look. The step-by-step process and honesty about the sewing struggles made it even more fun to read. Great DIY project! Discover the ultimate solution for clean water with our Canature water filter! Canature offers advanced systems designed to provide safe, pure, and affordable water for homes, businesses, and industries across Pakistan.
ReplyDelete