Thursday, November 29, 2012

DIY Neck Heat Pads


I take zero credit for these little babies.  Sew4Home gives an amazing tutorial and I just followed it.  That's it.  Well, I did make a few adjustments to fit my needs.  But that's it.  Really.

I followed the instructions to a tee the first time.  The bag came out great, but I thought it was a bit too big for me.  So, for my next try, I just cut the size down a little and created three compartments instead of two. I filled my bags with white rice and lavender buds.


 Here's the back . . . . loving on flannel.


 I've got a whole basket heading over to Robin's Egg tomorrow.  If you've got a sore neck, shoulders, back, or wherever, I've got the cure.  And they come in pretty fabric.  And they make fabulous gifts.  :)


Debbie


Saturday, November 24, 2012

Meet Francesca, the dresser

Francesca started out like many dressers, stained your basic brown and coated with a sealer.  Over the years, the brown became more drab and the sealer was bruised, beat up and flaking.


She was just waiting for this makeover.


Yet I waited patiently for my shipment of Miss Mustard Seed's Tricycle Red Milk Paint. This was my first experience with her paint and it HAD to be Tricycle Red.  HAD to be.

Oh, such pretty packaging
After applying my first coat, I waited like an evil genius:  rubbing my hands together by my face, chanting something like, "Chip away, my pretty, chip away."  But, alas, no chipping.  I applied the second coat, still an evil genius, but definitely less conviction.  There was a little "wanna-be" chipping going on in a few places.  I put on a third coat, and not much more.  I had read (as I read all Miss Mustard Seed's posts), that this can happen, and the paint is unpredictable.  So, I just went with it and decided to whip out the sander and go to work.


After distressing,  I layered with clear and dark waxes.  The nooks and crannies of this piece screamed for some dark wax.  The top was stripped, stained, coated with polyurethane and then layers of wax, as I can't get enough of a wax finish.

Loving the dovetail construction

She is still "my pretty".  Francesca is available for the taking (unless she was swooped up this weekend at the big Holiday Event) at Robin's Egg.


Debbie


Friday, November 23, 2012

The Anniversary of the Day that Changed My Life

It was one year ago today that the floor fell away from my feet.  One year ago today that Black Friday will now have a completely new meaning.  One year ago today that I had to call in the troops because I knew we couldn't handle it alone.  It was one year ago today that my sweet boy was diagnosed with acute lymphoblastic leukemia (ALL).


Leukemia isn't all Jack has had to experience.  He was born with Down syndrome, which means absolutely nothing to him (and the more you know about Down syndrome, the more you realize that it shouldn't).  He smiles and laughs his way through the day.  He still does, even undergoing cancer treatments.  Jack has also had two major hip surgeries, both requiring a body cast for months at a time.  Once again, laughing and smiling, army crawling in his cast.


I know he'll get through this.  Maybe that's why I can say leukemia hasn't been all bad.  We've done things and met people we never would have if he wasn't stricken with this illness.  The love and outpouring of support from dear ones, but mostly from complete strangers, has turned our world upside down.  And the love keeps on coming.

One year down; 25 months to go.

One day it will be nice to see Black Friday as a day to freeze your ass off standing in lines at 2am for crazy deals, rather than remembering that alarming phone call that an oncologist is waiting for you to travel into Boston because we suspect your child has leukemia.

Take care,


Debbie

Thursday, November 22, 2012

The Birch Tree Coat Rack

When I saw this little baby on Craigslist, I thought it looked like a tree.  And I have an affinity for birch trees.  So, after a few layers of paint, I'm hoping I achieved the look.  (***crossing fingers that you think so; no fine artist degree here***).

Here she is before, in all here orange pine stained glory:


And here she is after **trying** to achieve the look:


Am I the only one seeing it?  I think the design lends itself to a tree.  Or maybe I just need to get out of living in the woods.


I started with a base white after priming.  Then I added a tiny bit of black to the white to make a very light gray.  I used a large bristle brush so it would create a texture kind of look.  Then I added the black and brown "bark characteristics" of the birch tree with an artist's brush.  I thought much of that was too highlighted, so I went over those parts with the light gray again.  Three coats of polyacrylic later, and here she stands.


Everyone needs a place to hang their Christmas hats.  ;)  If you need a place to hang your Christmas hats, she's for sale at Robin's Egg.

Debbie


Sharing with: 


Sunday, November 18, 2012

We're in Business! And a Holiday Event!

We are officially in business!  The creations by myself and my partner can be found at Robin's Egg and we're thrilled to be there.  If you read this post, you can check out the photos I took of the rest of the store.  In the meantime, here are photos of our little space:

Loving Brenda's dresser

Now that I've given you a glimpse of our shop, I'm giving you are extra special reason to visit:  The Holiday Open House at Robin's Egg.  This weekend, November 25th and 25th, is Robin's annual Holiday Open House.  If you print out the Early Bird ticket below, or head to their Facebook page to print it out, you can arrive one hour before the doors officially open.  Sounds good to me!


Also, the shop is collecting new fleece blankets for a wonderful local charity.  You bring a blanket, you get 10% off your entire purchase.  Another win win.

 Have fun shopping,


Debbie


Sunday, November 11, 2012

DIY Ruffled Curtains


I've been wanting to make small changes to our kitchen, and shabby ruffled curtains were just the right touch!  Kind of happy with how these bad boys came out.  I mean, I am no seamstress.  Darts are what I throw at a board in the local pub and I still haven't figured out where that third thread comes from, somewhere in the depths of the bobbin.  It's such a mystery to me.

But, I've seen the rage of ruffles (yes, it's a thing) and I've been intrigued with using painter's cloth for a project, so I broke down and dug the sewing machine out of the bowels of the basement.  And I'm glad I did.  :)  Although my curtains are quite different than theirs, I have to credit two blogs for giving me the inspiration:  The Shabby Creek Cottage and Thistlewood Farm.  Check out both links if you can, as they are full of good information.

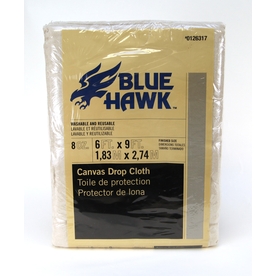
So, the first step was to head to my local handy, dandy Lowes and pick up a package of the thinnest painter's drop cloths they had.  I opted for the 6'X9' 8oz. cloth, thinking it might be enough (turns out I needed a little more, so I had to buy another package).  I made sure to wash and dry them before using.

Blue Hawk 9-ft x 6-ft 8 Oz. Canvas Drop Cloth

Next, I measured the width of my windows and decided on the length I wanted the valances.  I also knew that I wanted three ruffles, and knew that each ruffle needed to overlap the other by 2".  Also, as you can imagine, your ruffle strips needs to be 4X than the measured width of your window, as you "lose" so much fabric in the ruffling.  Since I'm not a girl about exact measurements (ha!), I decided to take the long end of the painter's cloth (9') and cut them into 6" wide strips hoping they would be long enough.  Since I am making lazy shabby curtains, I am leaving all the ends frayed and not creating a hem.


Now, I don't have one of those fancy, dancy ruffler feet for my machine, so I just winged it:  I folded over the fabric every 1/2" to 1 1/2", varying it so it wouldn't look so uniform.  I used a simple long, straight stitch.  (The hem you see is the original edge of the painter's cloth.)


When I was finished, this is what it looked like:


Now, after making my three ruffled strips, you need something to stitch them to.  So I measured the curtain size I wanted (width and length of the curtain) and cut a piece of painter's cloth that exact size.  I pinned my first strip, making sure the bottom of my ruffle matched the bottom of the back fabric, and stitched it on, going across the same stitch I made making the ruffles.


After stitching the first strip on, I then trimmed any excess of the ends (turns out using the 9' width worked out perfectly).  I then attached the second strip, overlapping by 2".  The final strip was stitched right at the top.  I knew I wanted to use black clips on the curtains (due to the black chairs in the kitchen), so I just clipped and hung away!


 The kitchen door window was a bit smaller, so I sized down the ruffles.


Overall, I'm very happy with the curtains.  My husband does wish I had hemmed the edges, but he is not on the same side of shabby that I am.   :)

Have a shabby, ruffled day!


Debbie 


Thursday, November 8, 2012

Join the November SPARK Party and Printcopia Giveaway!

So, I've been asked to guest host a SPARK party for the month of November. YIPPEE!!!! Link up your fun holiday items you've been working on. Or get inspiration from the entries below!
Photobucket

It's November, that means that not only are we all gearing up for the holidays, but it's also time for our new November SPARK themed party!

Time to inspire and be inspired with our recipes, stories, home decor, photography, crafts, DIY projects, Etsy items, and more.

The November theme for the month is-

Photobucket

A big welcome and thank you to our party giveaway sponsor this month-

Printcopia

Printcopia is a photo printing company that creates personal photos on canvas prints. The process is super user-friendly, just click the link and upload your photo. You even have to option to upload from Facebook or Instagram.
One lucky winner will receive a custom 8x10 canvas print (ARV over $40)

a Rafflecopter giveaway

SPARK is co-hosted by these lovely blogs


and these November guest hosts

PhotobucketPhotobucketPhotobuckettwelve-O-eight


SPARK Participation Guidelines

1. Become followers of each of the co-hosts as well as our guest hosts. We all have a variety of follow options on our blogs to make it easy for you.
2. Only family friendly links
3. Feel free to link up your Etsy items (not your shop), but no more than 5 items per Etsy shop
4. NO giveaways or linky parties
5. Link up to the original post, not your main blog
6. Please grab a party button (found at the end of this post) and display it on your blog somewhere. If you're not a blogger, a shout out on your social media sites is greatly appreciated. The more the merrier!

November Theme- Here Come the Holidays


Remember, each month has a unique theme, and we ask that you only link up posts or items that are relevant for that month. Please grab a button to post on your blog and help spread the word!


Photobucket


Have fun!